
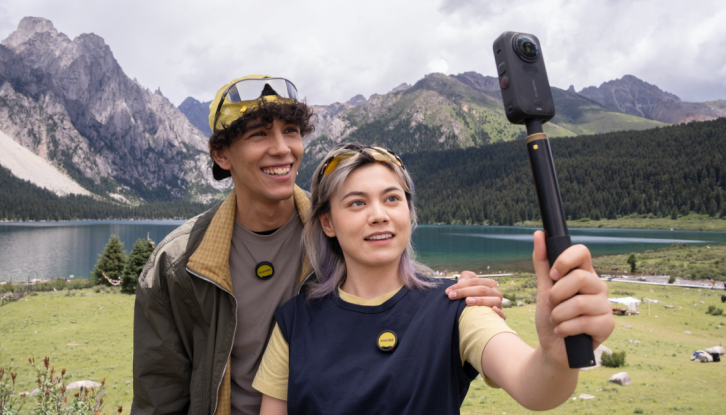

The Insta360 X6 can work as a 360 camera, an ultra-wide action camera, a low-light camera and a conventional stills camera. That versatility is useful, but it also makes the mode menu look more complicated than it needs to be.
The simplest way to choose is to start with the output you want. Use 360 Video when you want to capture everything and choose the angle later. Choose InstaFrame 2.0 for a flat clip you can share immediately. Switch to PureVideo for difficult low-light scenes. Use flat Video when you already know which direction matters and want the X6 to behave more like an action camera.
This guide explains all the Insta360 X6 shooting modes, what each one produces and how much editing it needs. The modes written about in this blog post are from the Insta360 X6's current firmware, that said firmware can change features or available combinations, so ensure to check the camera and Insta360 app before an important shoot.
At a glance
- Use 360 Video for maximum freedom to reframe after recording.
- Use PureVideo for low-light and night scenes.
- Use InstaFrame 2.0 when you want an immediately usable flat 4K clip.
- Use flat Video when you can point the camera at the action as you record.
- Use FreeFrame Video when you want to decide the aspect ratio later without recording a full 360 view.
Shop the Insta360 X6 Essentials Bundle

How many shooting modes does the Insta360 X6 have?
The X6 has 16 menu choices across 360 video, flat video, 360 photo and flat photo, as shown in the official X6 specifications. Those choices represent 12 distinct mode names because Video, PureVideo, Loop Recording and Photo each appear in more than one capture context. The 360 and flat versions serve different workflows, so the camera correctly presents them separately.
| Capture context | Listed choices | Number |
|---|---|---|
| 360 video | Video, PureVideo, Timelapse, TimeShift, Bullet Time, Loop Recording, Road Mode | 7 |
| Flat video | Video, InstaFrame 2.0, PureVideo, FreeFrame Video, Loop Recording | 5 |
| 360 photo | Photo, Interval, Starlapse | 3 |
| Flat photo | Photo | 1 |
| Total menu choices | 16 | 16 |
This is a crucial point to note to ensure that you don't accidentally shoot in flat PureVideo mode when your intention is to shoot in 360 PureVideo mode. They're both low-light modes, but the creative freedom and editing workload are different.
Also note that colour profiles and processing tools do not add more shooting modes. I-Log, Dolby Vision, resolution, frame rate and other options change how a selected mode records. They do not replace the decision between 360, flat video and photo capture.
Which X6 mode should you use? A quick chooser
Choose the mode according to what you are trying to prioritize: viewpoint freedom, low-light quality, speed of delivery or recording duration.
| What you want to do | Start with | Output and workflow |
|---|---|---|
| Capture everything and frame it later | 360 Video | Typically an INSV 360 file; reframe and export |
| Record a dark venue or night scene | PureVideo | Choose 360 for reframing or flat for quicker delivery |
| Get a conventional clip quickly | InstaFrame 2.0 | Direct flat 4K output; a 360 backup is available at supported settings |
| Use the X6 like an action camera | Flat Video | Direct MP4 pointed in one direction |
| Choose landscape, portrait or square later | FreeFrame Video | Flat capture with aspect-ratio and stabilisation choices in post |
| Compress a scene while the camera stays still | Timelapse | 360 time-compressed sequence |
| Compress time while moving | TimeShift | Moving 360 hyperlapse-style sequence |
| Create an orbiting slow-motion effect | Bullet Time | Special 360 capture; accessory and clear space required |
| Keep only the most recent recording segment | Loop Recording | Available in 360 or flat capture |
| Record a driving journey continuously | Road Mode | Driving-focused 360 workflow |
| Capture a full environment as a still | 360 Photo | INSP/DNG workflow; reframe or export |
| Photograph star trails | Starlapse | Long, stable 360 night sequence |
If you are new to the camera, learn four modes first: 360 Video, InstaFrame 2.0, PureVideo and flat Video. The specialised modes become easier to understand once you know whether you prefer to frame in-camera or reframe afterwards.

The seven 360 video modes explained
All seven modes use the X6's two lenses to capture around the camera. Their purposes differ, but their central advantage is the ability to record more than one conventional camera angle at once.
1. 360 Video: the default for shoot first, frame later
360 Video is the best all-round mode when the action is unpredictable or you want several edits from one take. It records everything around the camera, allowing you to point a virtual camera at a rider, a landscape or yourself after the event.
This is the mode to start with for travel, family occasions, events, motorcycle rides and action where turning a conventional camera would cost you the moment. The invisible-selfie-stick effect is created during stitching, which can produce third-person views without showing the stick in the final frame.
The trade-off is post-production. The X6 records 360 video as INSV files. You normally open those files in the Insta360 app or Insta360 Studio, add keyframes or tracking, choose an aspect ratio and export a flat video. The X6 supports up to 8K50fps in this mode, but maximum resolution is not automatically the right choice for every job. Frame rate, available light, storage and delivery resolution all matter.
2. PureVideo: for low light and difficult night scenes
PureVideo is the X6's purpose-built low-light mode. Its imaging pipeline reduces noise and recovers detail in dark scenes. Use it for night markets, evening streets, concerts, indoor events and campfire scenes where standard capture starts to look noisy or muddy.
PureVideo is available in both 360 and flat capture. Choose the 360 version when the action can happen anywhere or you want to reframe later. Choose flat PureVideo when one direction matters and a simpler conventional file is more valuable than viewpoint freedom.
It is not necessary to use PureVideo in bright daylight simply because it sounds like a premium mode. Standard 360 Video gives you a wider set of resolution and frame-rate combinations, including the X6's highest 360 frame rates. Select PureVideo when the light presents a real problem, then test exposure and motion before the event begins.
3. Timelapse: when the camera stays still
Timelapse compresses a long, slowly changing scene into a shorter 360 sequence. It suits sunrises, passing clouds, traffic, a busy exhibition floor or progress on a building site.
Keep the camera stable and plan for the entire duration, not only the opening frame. Movement close to the lenses can create distracting jumps, while a poorly placed tripod can dominate the bottom-most part of the 360 view. Timelapse records at 16K or 8K at 30/25fps. Please note that 16K Timelapse currently requires Insta360 Studio for preview, editing and export.
4. TimeShift: when the camera moves with you
TimeShift is the moving counterpart to a stationary timelapse. It speeds up a journey while the camera travels through the scene, creating the flowing hyperlapse look often used for walks, cycle routes and road-trip transitions.
Because the recording is 360, you can redirect the viewer towards a landmark, the road or the person carrying the camera during the edit. A secure mount and deliberate route still matter. Reframing cannot rescue severe vibration, an unsafe mount or a lens covered by dust.
5. Bullet Time: orbiting slow-motion shots
Bullet Time creates the familiar orbiting slow-motion effect by swinging the camera around the subject. It records dedicated high-frame-rate combinations up to 8K100fps, 6K120fps and 4K240fps, with unusually wide frame dimensions designed for this effect.
This mode typically requires a compatible Bullet Time accessory or another manufacturer-approved setup, plus generous clearance. Check for people, vehicles, branches, overhead structures and anything else the camera or line could strike. It is a planned creative shot, not a general handheld mode.
6. Loop Recording: keep only the latest segment
Loop Recording continually records while retaining a recent window instead of filling storage with the entire session. It is useful when you are waiting for an unpredictable moment, such as wildlife appearing, the start of a ride or an event that may happen within a broad time window.
The mode is available in 360 and flat capture. Use the 360 version if the important action could occur in any direction. Use flat Loop Recording if the camera can stay aimed at one known area. Confirm the selected loop duration and available storage before relying on it.

Loop Recording selection shown on an X5. The operating principle carries across the X series, but the X6 interface and available settings can differ by firmware.
7. Road Mode: continuous capture for a journey
Road Mode is the X6's driving-oriented 360 option. It is designed for continuous journey capture where surrounding context matters, rather than for one short cinematic clip.
Road Mode functions similarly to Loop Recording, in that it doesn't fill storage but records clips within a loop window. Loop Recording retains footage according to a selected time duration. Road Mode records within storage space allocated to the road loop. In either case, verify power, storage and mounting before leaving. A camera must not obstruct the driver's view, and local road, privacy and recording rules still apply.

Road Mode storage behaviour shown on an X5. The X6 interface and available settings can differ by firmware.
The five flat video modes explained
Flat video modes capture a conventional view instead of the complete sphere. They reduce or remove the reframing stage, making them better for fast delivery and situations where you already know where the action will be.
1. Flat Video: use the X6 like an ultra-wide action camera
Flat Video points one lens at the scene and records a conventional MP4. It is the direct choice for helmet, chest, handlebar and handheld shots when you can aim the camera correctly during capture.
Flat Video records up to 5K60fps or 4K120fps, with a field of view up to 170 degrees at 5K30fps. Higher frame rates are useful for fast action or slow motion, while the widest setting is useful when you want an expansive action-camera perspective. Check the supported field of view for the exact resolution and frame rate you select, because the maximum 170-degree view does not apply to every combination.

2. InstaFrame 2.0: ready-to-share 4K with intelligent tracking
InstaFrame 2.0 is for people who like the X6's ability to capture all angles but do not always want to build an edit from scratch. It can track a person, animal or object and record a direct flat 4K video. At 30, 25 or 24fps, it can pair the 4K standard output with an 8K 360 backup.
That backup is useful when tracking chooses the wrong subject or the best moment happens outside the flat frame. You can return to the 360 recording and create another angle. The cost is a larger set of files and more storage than a flat-only clip.
Choose InstaFrame 2.0 for vlogging, family travel, walk-and-talk content and fast social delivery. If you already know the precise fixed composition you want, ordinary flat Video is simpler. If you need complete manual control over multiple angles later, 360 Video remains the more flexible starting point.
3. PureVideo in flat mode: low-light footage without reframing
Flat PureVideo applies the low-light processing of PureVideo to a conventional view. It records 4K and 2.7K in horizontal, vertical and near-square aspect ratios at supported frame rates up to 60fps.
Use it when you are filming a stage, speaker, street or vehicle in a known direction and want a simpler path to delivery. Use 360 PureVideo when the subject moves around you or when selecting the viewpoint later is worth the editing time.
4. FreeFrame Video: choose the frame shape after recording
FreeFrame Video sits between conventional capture and full 360 recording. It lets you postpone decisions such as aspect ratio and stabilised orientation, making one take easier to adapt for landscape, portrait, square or other social formats.
FreeFrame records 6K at 30/25fps and 4K at up to 60/50fps, with 16:9, 9:16, 4:3, 3:4 and 1:1 output options. It is designed for post-processing in the Insta360 app or Studio so you can apply the desired framing and stabilisation, as shown in the X-series shooting-mode guidance. Mode behaviour can change with firmware, so confirm the available controls on the current X6 software. Choose it when multi-platform delivery matters but you do not need the complete view around the camera.
5. Loop Recording in flat mode: one direction, recent action
Flat Loop Recording keeps the conventional forward-facing approach while retaining only the latest portion of an ongoing recording. It suits a fixed view of a trail, road, goal area or wildlife location when the event time is uncertain.
The advantage over 360 Loop Recording is a simpler output and a clearer focus. The limitation is equally clear: if the moment happens behind the selected lens, it is not in the recording.
The four photo menu choices explained
The X6 lists three 360 photo choices and one flat Photo choice. Photo appears twice because the 360 and flat versions produce fundamentally different views.
1. 360 Photo
360 Photo captures the complete environment for an interactive panorama, a tiny-planet treatment or a conventional still framed later. It records up to 120MP at 15,520 × 7,760 pixels.
The file still needs an appropriate export workflow. The available photo formats are INSP and DNG, with INSP files exportable through the mobile app or desktop Studio software. High pixel count helps when extracting a conventional frame, but composition, stitching distance and clean lenses remain essential.
2. Interval
Interval mode records 360 photos repeatedly at a selected interval. Use it for a long activity, an evolving scene or an action sequence where pressing the shutter at exactly the right moment is impractical.
It gives you a set of stills to review rather than one compressed video. That makes it useful when your final output is photography, but it also creates more files to sort. Secure the camera, check the interval and estimate the storage and battery needed for the full sequence.
3. Starlapse
Starlapse is designed for star trails and time-compressed movement across the night sky. It needs a solid tripod, a dark location, enough recording time and a battery plan. Move away from strong city lighting where possible, check the weather and moon phase, and keep both lenses spotless before starting.
The artistic result depends more on planning than on simply selecting the mode. Frame interesting foreground detail around the camera, then test exposure before committing to a long sequence.
4. Flat Photo
Flat Photo uses one direction to create a conventional still at up to 42MP with a 1:1 sensor output. Choose it when you want a normal photograph and do not need to decide the viewpoint afterwards.
This second appearance of Photo is one reason the camera has 16 menu choices but fewer unique names. The flat and 360 versions share a basic purpose, but they record different fields of view and lead to different editing workflows.
Modes, settings and colour profiles are not the same thing
A shooting mode decides the kind of capture. Settings such as resolution, frame rate, exposure, field of view and colour profile determine how that capture is recorded.
The three colour profiles are Standard (Rec.709), Dolby Vision and I-Log. Standard is the practical starting point when you want a conventional result with less colour work. Dolby Vision is an in-camera HDR delivery option for compatible workflows and displays. I-Log is intended for editors who want more control during colour grading. It requires an appropriate post-production process, so it is not automatically the best choice for footage that must be posted quickly.
The same distinction applies to AdaptiveTone 2.0 and stabilisation. AdaptiveTone 2.0 meters exposure separately for each lens, then uses tone mapping to preserve highlights and lift shadows. FlowState Stabilisation and 360 Horizon Lock control motion and orientation. These features influence the result, but the mode list does not count them as separate top-level shooting modes.
For a broader assessment of image quality, battery, software and upgrade value, read the independent X6 review roundup.
A practical 50Hz lighting note for South Africa
Eskom identifies South Africa's power-system frequency as 50Hz. Under mains-powered LED, fluorescent or stage lighting, 25fps or 50fps is a practical starting point because the timing aligns more naturally with a 50Hz supply. This is field guidance rather than an X6 specification. Match the camera's anti-flicker setting where available and test the actual venue.
This is guidance, not a guarantee. LED drivers, dimmers, electronic signage and stage fixtures can pulse at other frequencies. Record a short test, review it on a larger screen and adjust shutter speed or frame rate before the important take.
Which modes need editing before you can share?
The quickest workflow comes from flat capture. The most flexible workflow comes from 360 capture. InstaFrame 2.0 provides a useful middle ground. Current software and firmware are available from the official Insta360 X6 downloads page.
| Workflow | Modes | What happens next |
|---|---|---|
| Reframe or process before final export | 360 Video, 360 PureVideo, most 360 Photo work, FreeFrame Video | Open in the Insta360 app or Studio, choose framing or aspect ratio, then export |
| Faster delivery | Flat Video, flat PureVideo, flat Photo | Review, trim and share or edit like a conventional file |
| Direct output with a recovery option | InstaFrame 2.0 | Use the flat 4K clip; return to the optional 360 backup if needed |
| Specialised processing | Timelapse, TimeShift, Bullet Time, Starlapse | Build or export the intended time or motion effect |
File format is a useful clue. Standard-mode video is MP4, while 360 video is INSV. FreeFrame is a flat capture mode, but it still relies on Insta360 processing to apply the chosen aspect ratio and stabilisation before final export.
InstaFrame 2.0 can save time because it produces a direct flat clip. Recording the optional 360 backup gives you a safety net, but it also increases storage use and the number of files you must manage. Use that backup when recovery matters, not simply because the option exists.
Best X6 mode for real-world situations
The right mode is the one that protects the shot you are most likely to miss.
| Situation | Recommended starting mode | Why |
|---|---|---|
| Motorcycle or cycling ride | 360 Video | Reframe the road, rider or surroundings from one recording |
| Long road trip | Road Mode | Prioritises a driving-oriented continuous workflow |
| Night market or indoor event | 360 PureVideo | Handles difficult light while preserving viewpoints around the camera |
| Family or travel vlog | InstaFrame 2.0 | Produces a direct flat clip with tracking and an optional 360 recovery file |
| Wildlife or unpredictable action | 360 Video or 360 Loop Recording | Captures more directions and reduces the need to predict the exact moment |
| Property or scenic capture | 360 Photo | Preserves the environment for panoramic viewing or later framing |
| One take for several social formats | FreeFrame Video | Allows landscape, portrait and square choices during processing |
| Known subject in one direction | Flat Video | Delivers a conventional MP4 with less post-production |
Mounting and power can matter as much as the mode. For longer travel or action sessions, the X6 Essential Bundle includes an extra Xtreme Battery, 114cm Invisible Selfie Stick, lens cap and Fast Charge Case alongside the camera.
Frequently asked questions
What is the best all-round Insta360 X6 mode?
360 Video is the best general starting point because it captures every direction and lets you choose the angle later. If quick delivery matters more than reframing freedom, use InstaFrame 2.0 or flat Video instead.
Is InstaFrame 2.0 the same as 360 Video?
No. 360 Video is designed for reframing after capture. InstaFrame 2.0 records a direct flat 4K clip using intelligent tracking, with an optional 8K 360 backup at supported frame rates. It prioritises a faster result while preserving some recovery flexibility.
Should I use PureVideo during the day?
Use PureVideo when low light creates a real noise or detail problem. In good daylight, standard Video usually offers more resolution and frame-rate combinations. Test both if the scene contains deep shade or rapidly changing light.
Does FreeFrame Video need the Insta360 app or Studio?
Yes, FreeFrame is intended for post-processing so you can apply stabilisation and choose an output aspect ratio after recording. If you need a conventional file immediately, use flat Video or InstaFrame 2.0.
What is the difference between Loop Recording and Road Mode?
Loop Recording retains footage according to a selected time duration and is available in both 360 and flat capture. Road Mode is the dedicated 360 choice that loops within allocated storage space for a journey-focused workflow.
Start with four modes, then add the specialist tools
You do not need to memorise all 16 menu choices. Begin with 360 Video for maximum reframing freedom, InstaFrame 2.0 for fast flat clips, PureVideo for low light and flat Video for a conventional action-camera workflow. Add TimeShift, Bullet Time, Starlapse and the other specialist modes when the shot calls for them.
Choose according to the output you need and the editing time you have, not the largest number in the specification table. If the X6 fits that workflow, explore the Insta360 X6 range in South Africa or buy the X6 Essential Bundle for an all-round 360 experience.
Ayooluwa Uthman writes practical product guides for 180by2. Learn more about 180by2, including its 360-camera focus and South African support.